


There are several ways to capture & output Oculus Quest live. Here, I will outline my preferred technique, which uses Scrcpy to cast the stream across your Wi-Fi network (Note: 5 GHz router required!).
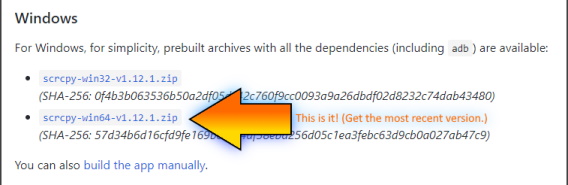
Download: Scrcpy & ADB | To 'screen scrape' the Quest and stream those captured images across Wi-Fi, we use a tool called 'Scrcpy' (pronounced Screen Copy) and ADB (Android Debug Bridge) to access the system which drives your Quest. Both of these free utilities are available for download in a single, bundled package.
Download here: https://github.com/Genymobile/scrcpy
Go to the site above and just scroll down to locate the Win32 or Win64 'prebuilt archives' download appropriate for your system. (i.e. if you're running Windows 10 (64-bit), get the Win64 one.)
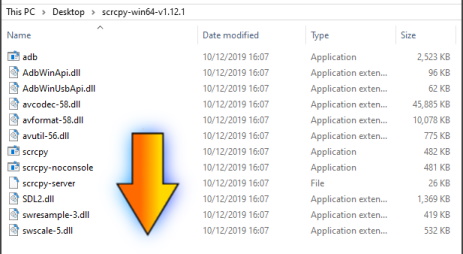
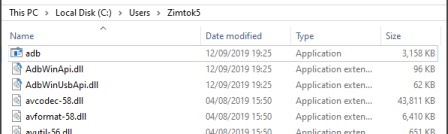
Install: Scrcpy & ADB | Extract the files (e.g. to a desktop folder) and then cut & paste the entire set of files into C:\ Users > USERNAME folder. This folder is not empty by default, so expect those files to mix with some pre-existing ones. That's fine.
Later, we'll revisit this directory to install the custom .bat file we will prepare to launch the Scrcpy application and display the Quest how we want to capture it in our streaming application of choice (OBS Studio / Streamlabs OBS).
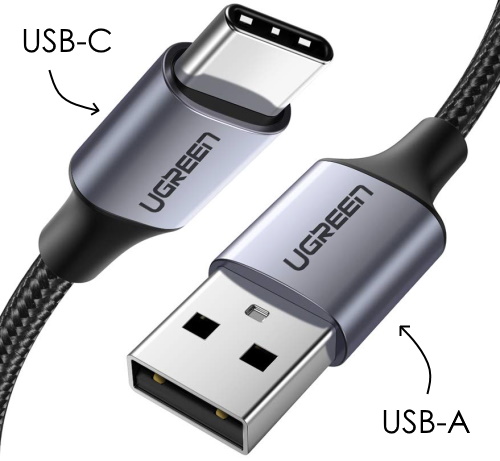
Buy Cable: Connect via USB-C | Do you have a USB-C cable to connect your Quest to your PC/laptop? If your machine is recent enough to have USB-C ports, a USB-C to USB-C cable will work. If not, then you'll need to pick one up a cable to suit this need. Buy a USB-A to USB-C cable to connect your Quest to the machine you will stream and capture on.
Note: You won't be cabled as you move around (like Oculus Link cable users). Instead, this is just to pass the Quest some commands to get Wi-Fi streaming going each time you stream. I recommend a 1m/3ft cable length for a desktop or laptop connection and 2m/6ft for under-desk PCs. Here's an example 2m UGREEN cable, similar to what I use:
Amazon.co.uk: https://www.amazon.co.uk/
Install: Oculus Mobile App | Given you cannot set up a Quest today without the companion mobile app, I'm going to assume you've installed this and it's already running on your device. If that's correct, just skip this step. If due to some bizzare combination, you don't have this yet, here are the related app download links:
Andriod - Google Play: https://play.google.com/store/
iOS - Apple App Store: https://apps.apple.com/
Configure: Oculus Mobile App | Now, we want to Enable Developer Mode via the Oculus mobile app. We're trying to ensure the Quest will happily connect to the PC, which in theory is just a toggle switch in the app. However, I've found depending on the machine I'm connecting to, I have to cycle this between on and off states to get the PC to recognise the Quest I'm plugging in. For me, this step has proven to be a bit finicky at times.
My advice, which I suggest be followed in this order:
1) Turn on the Quest and let it fully boot, reaching the Oculus Home screen.
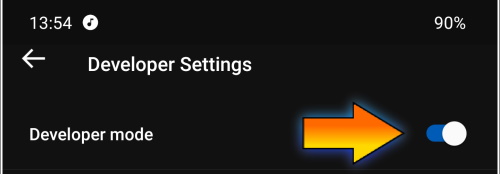
2) In the Oculus Mobile App, ensure 'Developer Mode' is switched on for your Quest.
To start, particularly if you own multiple Oculus headsets, ensure you have the correct device selected in the top left drop-down and follow these steps.
2.1) Select device type.
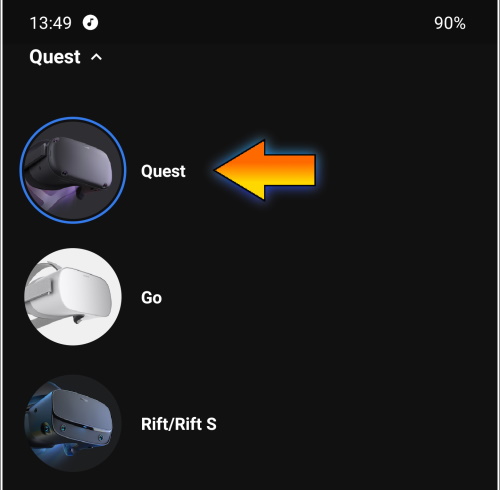
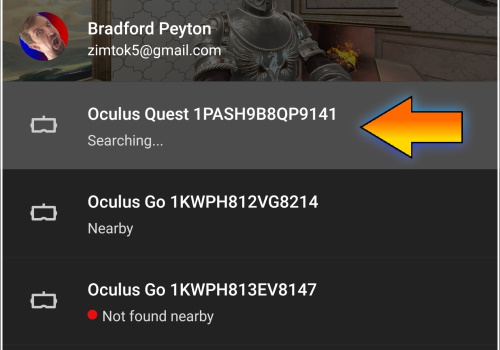
2.2) Choose specific headset.
2.3) Go to 'More Settings'.

2.4) Choose 'Developer Mode'.
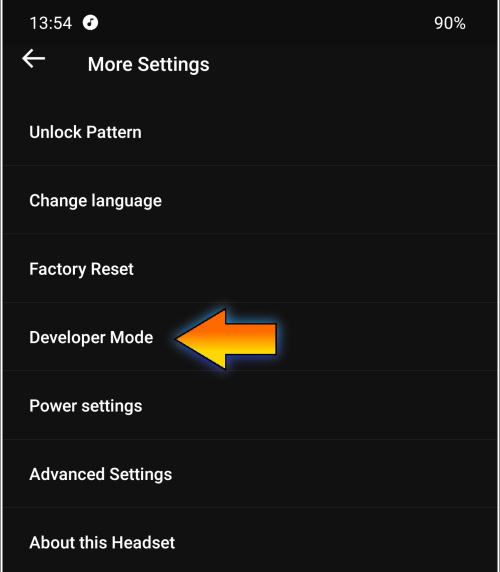
2.5) Toggle to 'On'.
3) Plug your cable into the Quest and PC/laptop, connecting the two together.
4) Be patient and let Windows auto-install the drivers needed to recognise the Quest.
Keep an eye on it and Windows 10 will give you an initial 'We're setting up your device.' pop-up message, then a 'Your device is ready.' pop-up about 10-40 seconds later, when it's done.

5) With the Quest cabled into the PC/laptop, look into the headset and allow the connection.
It looks like this:
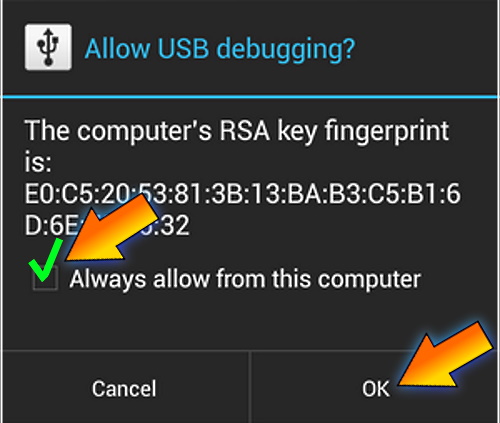
Click the option to 'Always allow from this computer' and then click 'Ok'.
Thankfully, once this is done once, you won't have to repeat this step again later, unless your PC forgets the connection and it prompts you again.
That's it for this part! Your Oculus Quest is now connected and ready to be fed some commands.

Having trobule? If you run into a roadblock, reboot the PC/laptop and reboot the Quest. Then, turn off and on the developer mode, and keep retrying until it works. I've spent 20 mins on occasion just on this step alone. Sometimes, I've needed to turn the developer mode off before my machine recognises the Quest; so don't fret. Be persistent. Thankfully, most people won't run into this kind of difficulty.
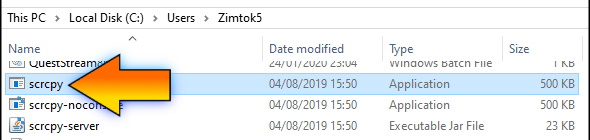
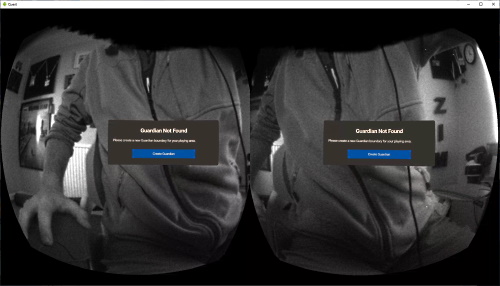
Test Connection: Quest to Scrcpy | With the Quest now connected, let's ensure everything is working. Go to the directory where you previously installed Scrcpy & ADB (C:\ Users > USERNAME directory). Please locate and run the 'scrcpy.exe' application.
This style of "double fisheye" display is what you should see; the default Scrcpy window:
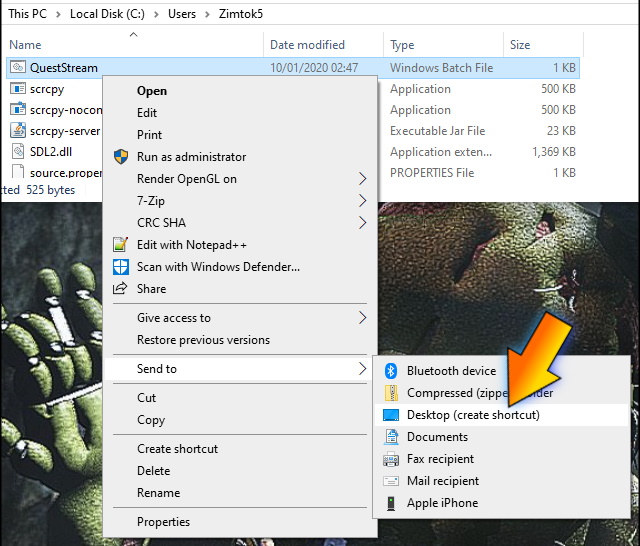
Create: Scrcpy BAT File | In this part, we'll create a .BAT file using Notepad (the basic Windows text editor) which will automatically scan for your Quest's correct IP address, connect to it, open a port for communication with your machine, and use Scrcpy via ADB to pull images down from the Quest.
WARNING: Now, although I am supplying a pre-prepared .BAT file for those of you who trust me (or are just hazardously lazy), please note that downloading .BAT files from the Internet is dangerous and it's not much different than running an unknown .EXE, which may harm your computer and files. In your shoes, I'd create my own and suggest you do the same. This also means you can customise the launcher to your own needs; leveraging Scrcpy documentation to tweak settings to your liking.
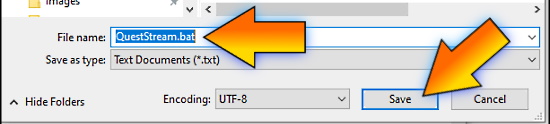
Option 1 - Make your own .bat | Download QuestStream.TXT
Simply download the .TXT file above, open with Notepad (and have a read to see if it's doing anything untrustworthy), then add a file extension of .bat before pressing save. Once saved, move the .bat file into your directory with Scrcpy & ADB (C:\ Users > USERNAME directory).
Option 2 - Trust the BAT-man | Download QuestStream.BAT
Download the .BAT file above and place it into the directory with Scrcpy & ADB (C:\ Users > USERNAME directory).
Create: Scrcpy Launcher | After placing the .BAT file, let's make things easier to stream and place a shortcut on the desktop. This will allow you to run it easily during (or in preparation for) a stream.
Try running our custom scrcpy launcher from your new desktop shortcut. What you see should is a fullscreen, single-eye representation of your Quest's view (right eye). Note: Customisation of the .bat file's crop instructions will be needed if you prefer to use the left eye instead. Refer to the Github Scrcpy page's detailed instructions how to achieve this change.

This fullscreen window is what you will capture with OBS Studio -or- Streamlabs OBS.
My desktop resolution is 1920 x 1200 for each monitor; so your viewer might be more cropped at the top and bottom if running 1080 height. If this causes you problems with later steps, then you may need to edit this command in the .bat file to tweak what you see on your monitor.
--crop 1440:1400:1425:100 | Edit this for display size (but note Quest has per-eye pixel limits)
--crop 1440:1400:1425:100 | Edit this for left eye (essentially, moving the origin for the crop)
Resolve: Multi Device Errors | If you are getting any errors relating to "too many devices" in the launcher window, then you need to reset and start again. To do this, you restart ADB with a one-line command. Just go to Windows Search (typically next to the Start button) > 'CMD' > and enter "adb kill-server". Once entered, you won't get any feedback. But, now you can retry the launcher again. Re-run the .bat file from the shortcut.
1) Search for Command Prompt.
2) Open Command Prompt.
3) Run reset command.
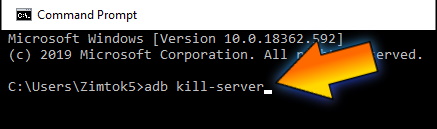
For easy copy/paste: | adb kill-server
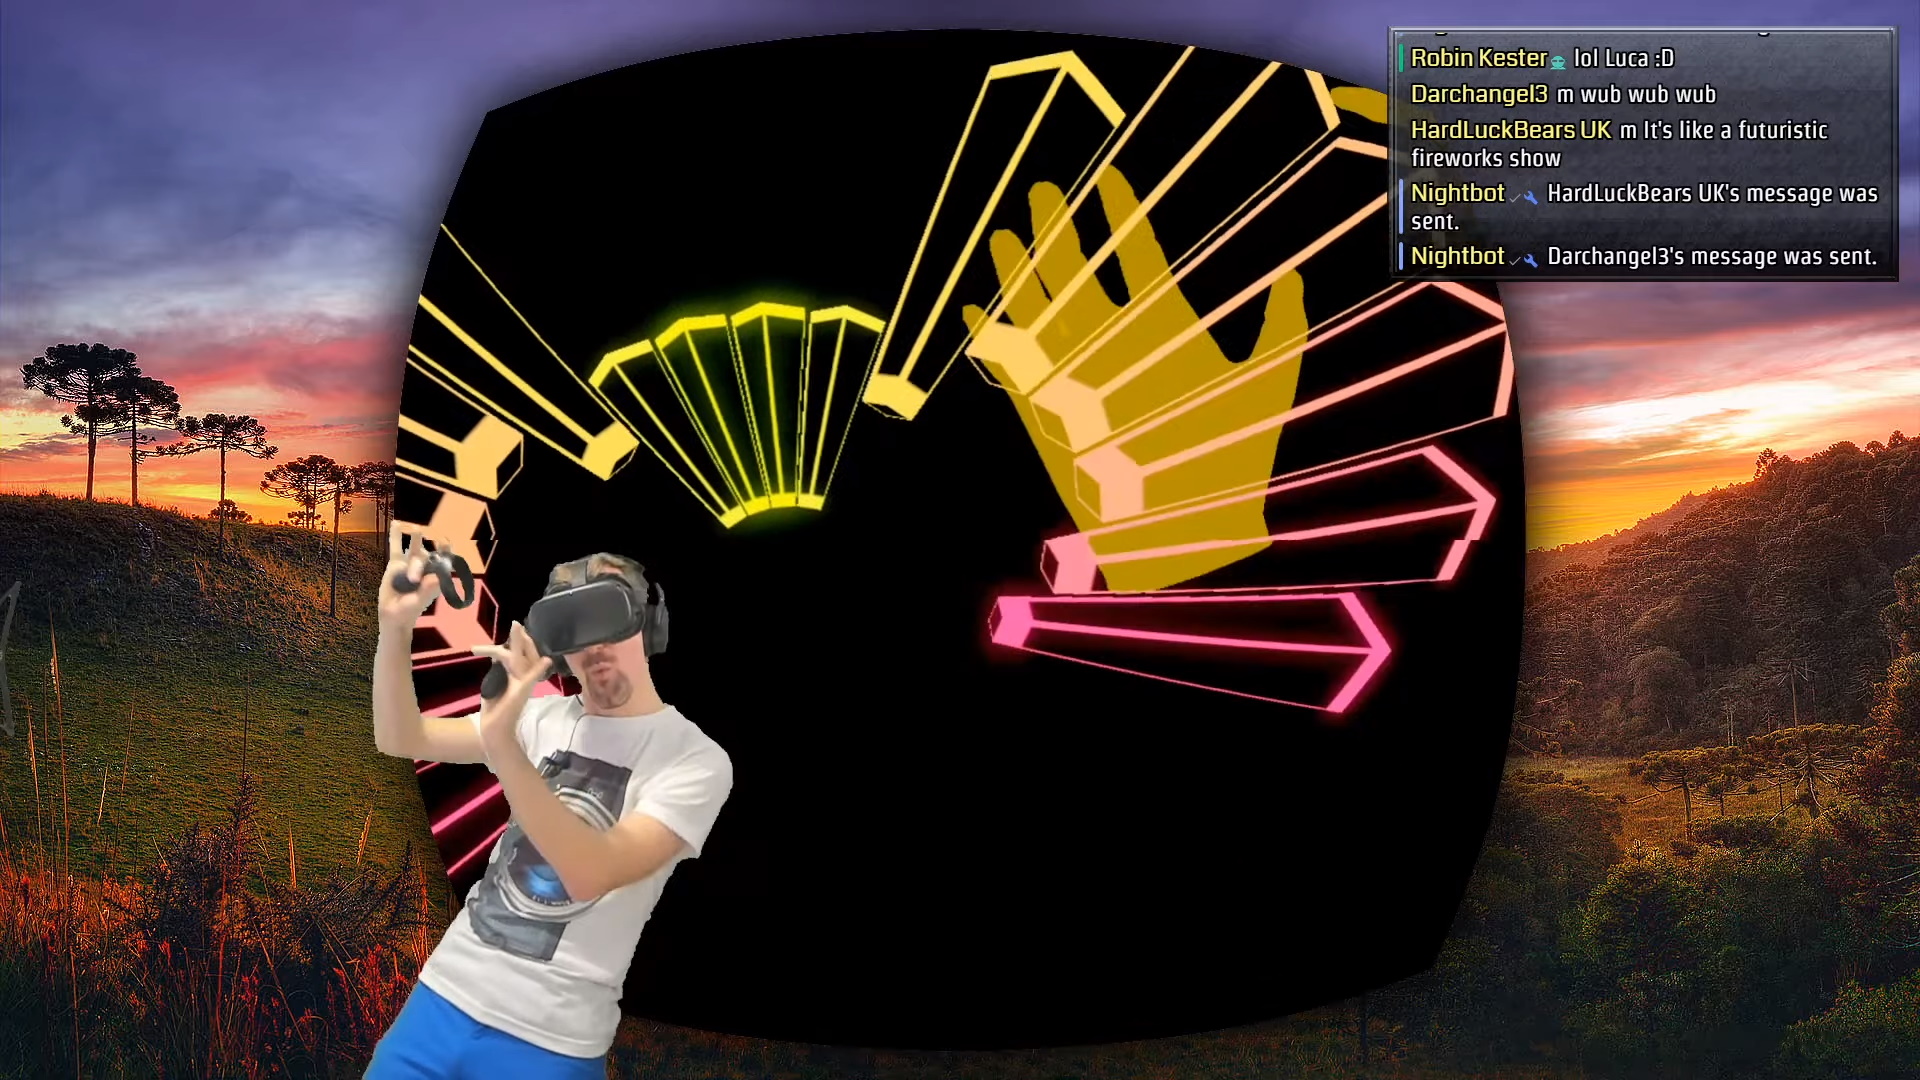
Polish: Makeover Time! | Although we successfully captured the Quest, the window which results (shown in step 8) is rough around the edges. Through various trials, I have found the best stream combination is to have a 3-layer sandwich with the Scrcpy layer surrounded by masking elements to make the capture border appear symmetric, clean-edged, and lifted off a custom background.
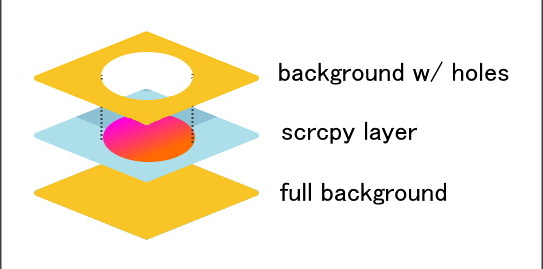
Let's show an example, so the order is clear from top to bottom, using the rough capture from earlier.
1) Mask with hole.
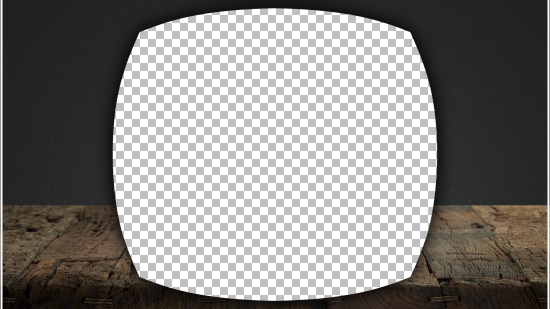
Layer 1 - Wood (with hole) | Download Template L1 (1920x1080)
2) Scrcpy layer (Quest capture).
Layer 2 - Scrcpy with Quest stream (window capture)
3) Background (this shows live when no capture running).
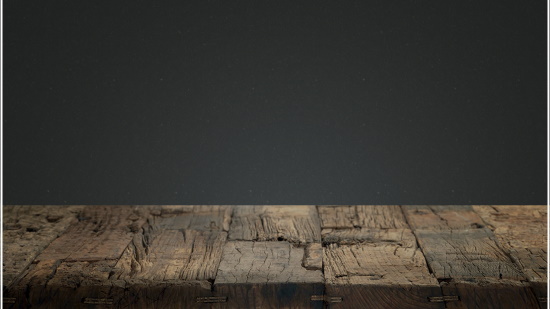
Layer 3 - Wood (background) | Download Template L3 (1920x1080)
Compositing these 3 layers together, we get a nice-looking live stream as the finished product.

Customise: Make It Yours | In order to give the stream your own flair, you can generate similar mask files easily enough using some pre-made alpha layer masks I've created. Any background image can be inserted and in a few minutes you'll have a customised layer set to use while streaming. To achieve this, you'll need both Paint.NET (free) and the Alpha layer plug-in (also free).

Download: ZIM's example, custom Paint.NET template. (Click image to save)

To get the alpha mask function working, you first install the plug-in, then copy to clipboard the background image, paste (inverted), and the alpha mask will create a clean cut. Save a version with a blank in the middle in PNG format and do the same with the background. Load those into your streaming application (e.g. OBS Studio -or- Streamlabs OBS). That's it.
Let's break this into simple steps.
1) Install the Alpha Mask plug-in, from here.
2) Once installed, the utility appears here in Paint.NET.
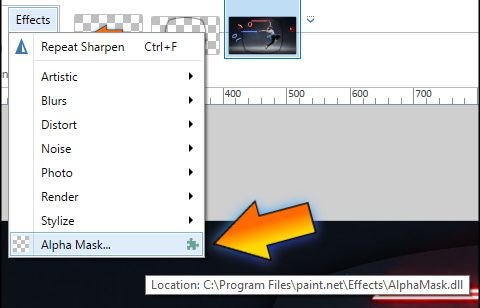
3) Copy your chosen 1920x1080 sized background to the clipboard (Ctrl+A, Ctrl+C), then click on the 'Alpha Mask' plug-in.

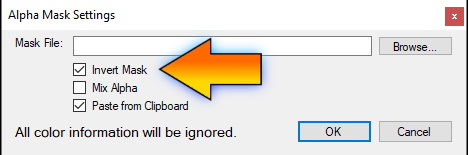
4) Choose to 'Invert Mask' and 'Paste from Clipboard'.
5) The result should look like this. Note the clean, smooth edges!
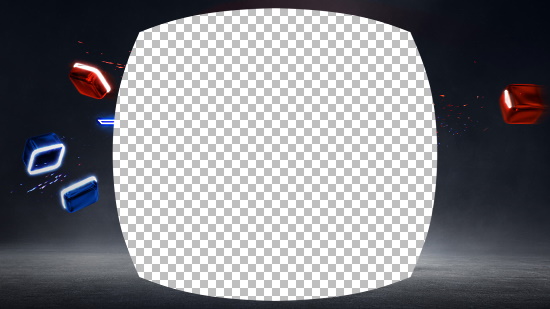
6) You now have the option of applying the shadow layer I've included in the template, to help lift the streamed image off the background; a neat effect.
7) Once you're done, save the resulting image as a .PNG. Do the same with the original background.
8) Order your images like the sandwich example above in your streaming app.
CONGRATULATIONS! You are now ready to stream from your Oculus Quest!
Recording: Quest Audio | I've listed 4 options here for picking up the Quest audio. Each solution has strengths and weaknesses based upon the recording setup and quality level you wish to deliver for your broadcast.
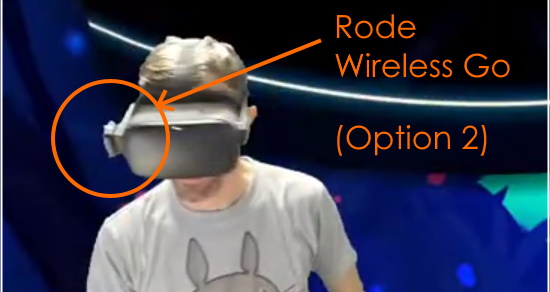
Option 1) Rode Wireless Go (cable to wireless transmitter, receiver to line-in) - Buy
+ Best quality Quest stream audio for the least $$$ in a wireless solution.
- Lasts 3 hours, then needs recharge. Requires headphones and external mic.

Option 2) Rode Wireless Go (loose) - Buy
+ Easiest setup, just clip (upside down on Quest side strap) and go.
- Audio is medium quality. Lasts 3 hours. Stands out oddly.
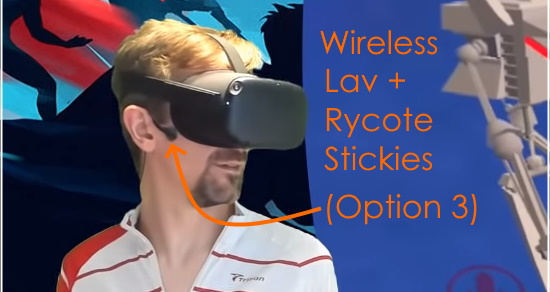
Option 3) Any Wireless Lavalier Mic + Rycote Stickies - Buy
+ Most streamlined solution (face mic). Looks sleek; works like magic.
- Audio is medium quality. Uses a disposable sticker & adhesive tape (for mic cord) each stream.
Option 4) Male-to-Male 3.5mm Extension Cord (5m/15ft) - Buy
+ Cheapest! High quality audio via direct line-in recording. OK for streams with no face cam.
- Wired (tangles up easily), looks messy. Requires headphones and external mic.

After more than 6 months streaming with the Quest, my preferences are Option 1 for general broadcasts (to give my audience the best possible quality audio) and Option 3 when I want to hear externally or give that sleek no add-on's look to a Quest show.
In my opinion, the best starting point is just picking up a Rode Wireless Go on it's own (Option 2). From there, you can experiment with various options like buying an inexpensive 1m/3ft cable for Option 1 and matching with some quality headphones. If you're looking to buy a dedicated lav mic to pair with the Rode Wireless Go, there are a few good options I'll cover in another guide.
Other considerations:
As pictured above, the headphones I use and recommend for their all-around sound reproduction quality, durability, and flexbility for travel are the Sennheiser HD 4.50 (Bluetooth and Noise Cancelling) headphones. They have a mild noise cancelling effect, which doesn't give that 'pressurised' feeling of other headsets. They pair excellently with the Quest (no physical conflicts) and come with a slim, 90-degree angled cable for a perfect wired match with Option 1, above.
Note: At this time (Jan 2020), whilst a Bluetooth implementation is available on Oculus Quest via Experimental features, I've found compatibiilty and support with various Bluetooth peripherals has been patchy and hence I use my headphones wired into the 2nd 3.5mm jack; dropping the excess cord down the back of my shirt when broadcasting.
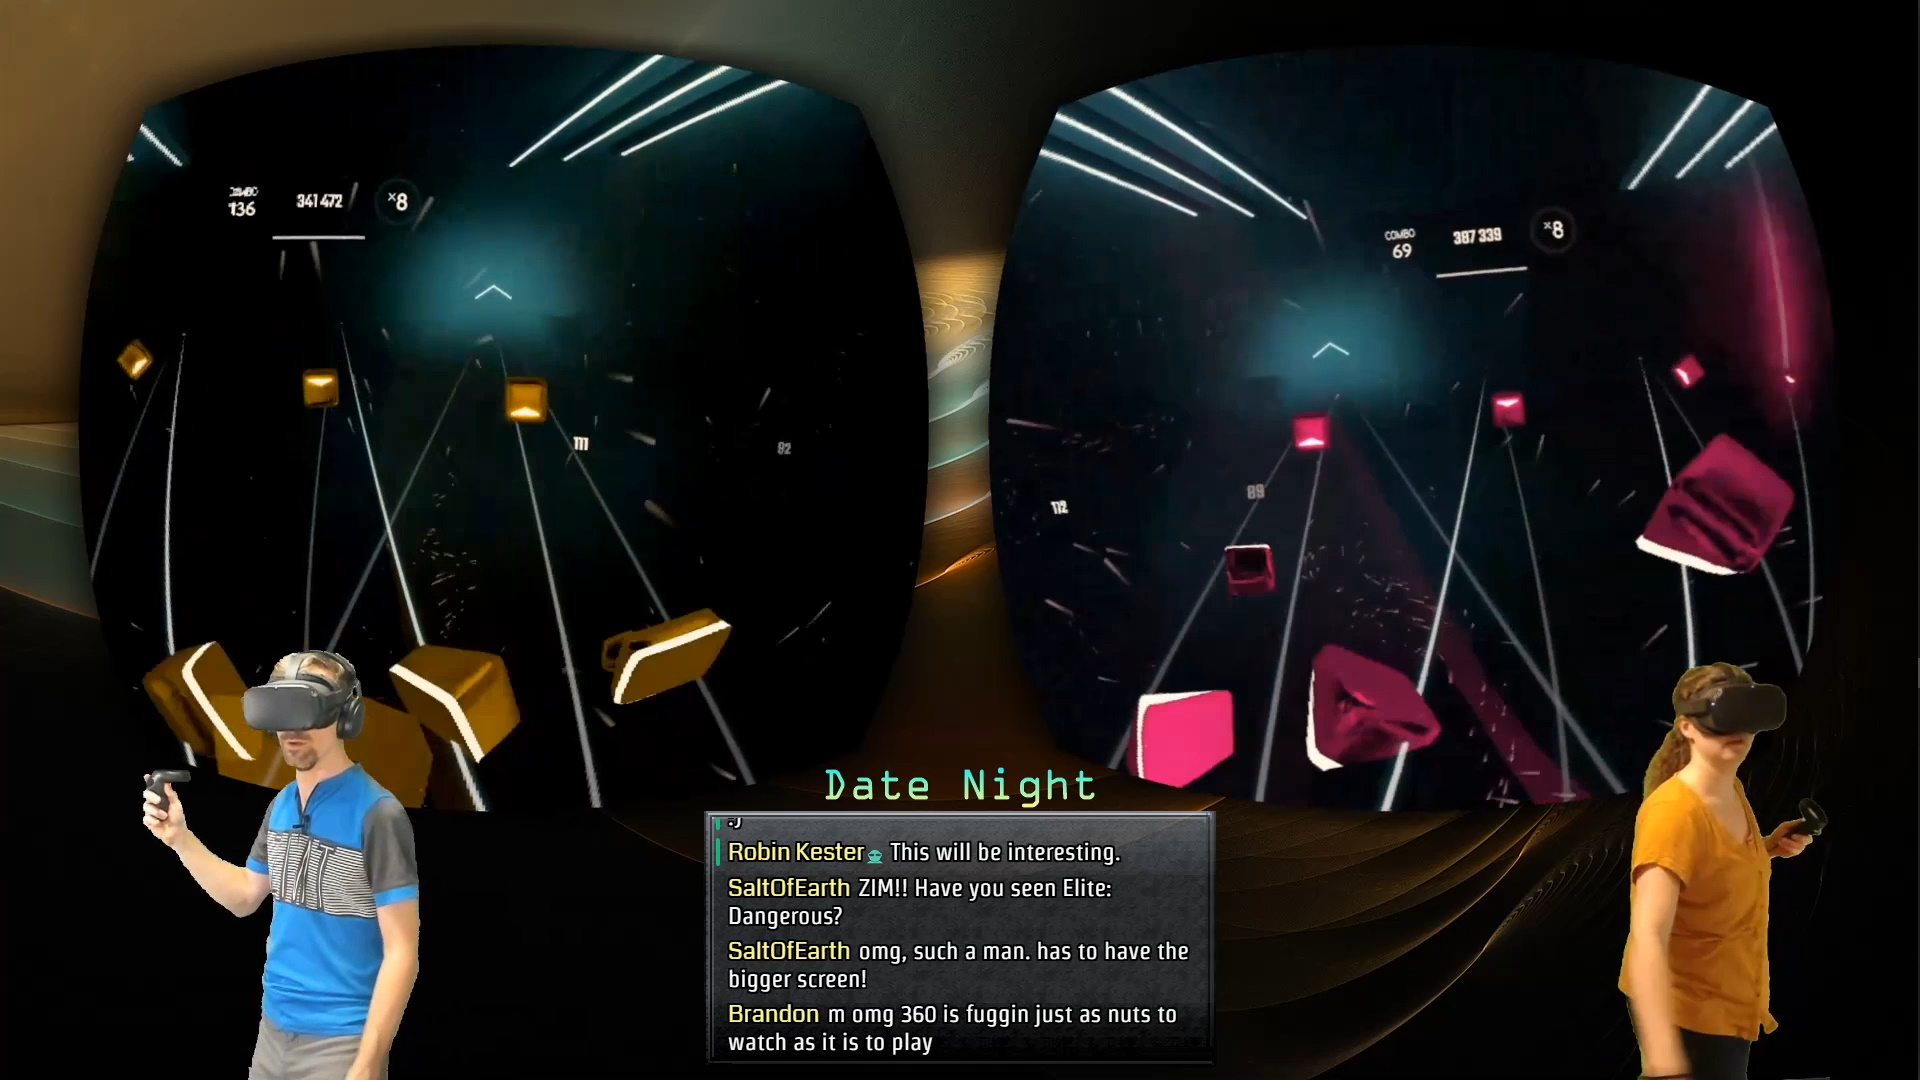
Experiment: 2 Quests, 1 Stream | At the time of writing, my wife and I are still experimenting with duo Quest streams, but have both a side-by-side and a big-small template available for your use. What goes behind using this is a little more technically complex, but I'll be going into that in another guide.
Duo: Side-by-Side Template. (Click image to save)
Duo: Big-Small Template. (Click image to save)

If you'd like to stay tuned to our further experiments, you can subscribe to my YouTube channel or follow me on Twitter. We hope this guide has been helpful to developers to market their games, satiate the technically curious and, most importantly, to support our fellow VR streamers!
- ZIM